
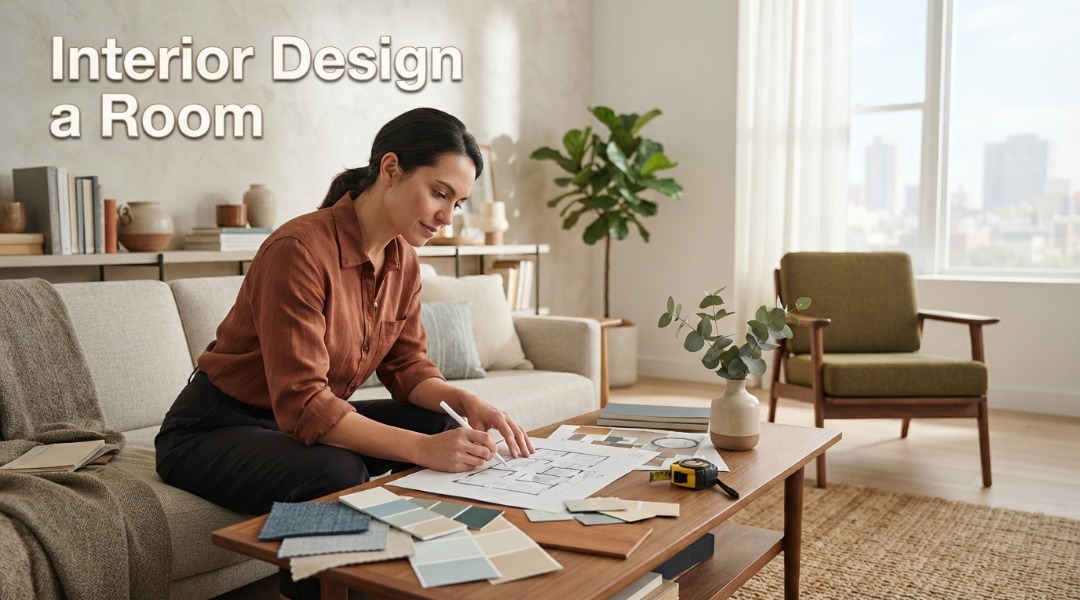
Designing a room looks painless until the sofa blocks a walkway, the lights feel harsh, and every pick-up seems a bit wrong. Knowing how to design a room’s interior gives you a clearer sequence of tasks. You can set up a comfortable space without wasting money or repainting twice.
Under normal conditions, shifting gears a bit, recent reporting says warm minimalism, quiet luxury, earthy tones, and soft silhouettes are recurring 2026 themes. You don’t need to copy them. Use the parts that suit your home, climate, habits, and rental rules.
Main points
- Start with function, measurements, and one clear focal point.
- Use 2–3 neutral tones with 1 accent color for control, then add texture through wood, linen, wool, rattan, or stone.
- Plan ambient, task, and accent lighting before buying decorative objects.
- Test large pieces with paper or painter’s tape before spending money.
What You’ll Need
You can design a room with a tape measure, graph paper, painter’s tape, a phone camera, mood-board images, fabric samples, and a simple budget. Allow a full afternoon for planning and several shorter sessions for buying and arranging. No formal design training is needed; careful measuring and restraint matter more than drawing skill.
Prepare a tape measure, pencil, notebook, floor plan, masking tape, and a phone. Add paint cards, curtain or upholstery samples, and screenshots from Pinterest, Houzz, IKEA, or local furniture shops. If you rent, include removable hooks, tension rods, plug-in lamps, and non-permanent wall options.
For the average user, set a spending limit. Before browsing, keep a separate allowance for delivery, hardware, bulbs, and small repairs; these costs all the time appear (depending completely on the context) after the main buy. A low-cost plan can still look polished when texture and lighting get attention.
“Create separation through placement, not walls.”, House Beautiful
Step 1: Define the Room’s Job
Write one sentence that explains what the room must help you do. A living room might need to support conversation, television viewing, reading, and storage, while a bedroom may need rest, clothing storage, and a quiet work corner.
Inspect how most of us move through the room at different times, so mark doors, windows, switches, outlets, radiators, ceiling fans, and fixed cabinets. In a Bangladeshi home, also check where sunlight enters. Where heat collects, and whether furniture will interrupt air movement from a fan or window.
Decide on a main activity before picking a style. If the room serves a few different purposes, divide it into zones with a rug, sofa position, lamp, or console, but this approach keeps an open plan flexible and avoids the cost of new walls.
What should you decide before buying furniture?
Decide the room’s main activity, traffic path, storage need, and focal point first. Furniture style comes later since an attractive chair still fails. If it blocks a door or leaves no usable path.
In most scenarios, try walking through the empty room while carrying a laundry basket or serving tray. That small exercise exposes awkward corners faster than a furniture catalogue does, so mark the path with tape before shopping.
Step 2: Measure and Draw the Layout
Measure every wall, opening, and fixed feature, then draw a simple plan before selecting furniture. You should end up with a layout that fits physically and leaves clear movement routes.
Putting that aside for now, what you’ll notice is record wall length, ceiling height, window width, door swing, outlet location, and the distance between openings. Draw the room on graph paper, or build it in the free version of Floorplanner or RoomSketcher. Add furniture rectangles using real measurements, including armrests and table overhangs.
Keep the largest piece away from the room’s natural path unless the plan clearly supports it. Funny enough, a sofa pushed rough against every wall can make a room feel stiff; floating it slightly may define a sitting area more in practice. Test both layouts with painter’s tape on the floor.
A practical warning is painless: rarely ever trust a product photo’s scale. A compact-looking three-seat sofa can dominate a small room once its arms and depth appear in person.
Step 3: Build a Mood Board and Color Plan
Collect images, fabric swatches, and paint samples, then reduce them to 2–3 neutral tones plus 1 accent color. You should end up with a palette that feels connected without making every item match.
Choose one anchor item, like a rug, artwork, sofa fabric, or patterned curtain. Pull colors from that item rather than starting with a paint chip. Digital screens distort color, so place physical samples near a window and under artificial light before deciding.
Color-drenching uses one main shade across walls, trim, and details for a unified tonal effect. It can make a small alcove feel deliberate. But renters may prefer matching curtains, artwork, and accessories instead of permanent paint.
For the average user, recent design coverage favors warmer, richer rooms over cool gray interiors with identical furniture. That direction makes sense for daily life. But trends should remain a small layer. A timeless wood table can survive a seasonal color change; a totally themed room may not.
ROOM PLANNING PRIORITIES (RELATIVE ORDER)
Step 4: Select Furniture by Scale and Use
Buy the largest functional pieces first, then choose smaller items that support their size, color, and purpose. You should end up with a room that feels balanced rather than crowded.
Start with the sofa, bed, dining table, or desk. Check seat height, depth, cleaning demands, and storage before judging appearance. Families with children or pets may need washable covers, rounded corners, and raised furniture that makes floor cleaning easier.
Mix shapes carefully, so soft silhouettes and curved furniture can reduce the rough feeling of a boxy room. One straight-lined cabinet can add structure. Avoid buying a complete matching set; repeated finishes often flatten the room and leave no visual pause.
For storage, measure what the cabinet must hold. A shallow closed unit may outperform a deep open shelf, which means because it hides clutter and collects less dust. In humid conditions, inspect wood edges, hardware, and ventilation rather than focusing only on the finish.
If the room includes a television, plan sightlines before mounting it. A low console can anchor the screen; hide cables, and keep the wall visually calmer. Especially when storage and viewing need to share one wall, more ideas appear in these TV unit arrangements.
Step 5: Layer the Lighting
Install three lighting layers: ambient for general visibility, task lighting for focused work, and accent lighting for depth. Add warm bulbs and dimmers where possible so one room can support several moods.
Begin with the ceiling fixture, then add a floor lamp, table lamp, reading light, or under-shelf strip. Place task lighting beside the activity, not across the room. A desk lamp should light the work surface without shining into your eyes.
This connects to something touched on above, so use accent light to draw attention toward art, a textured wall, plants, or shelving. Avoid placing every lamp at the same height; that puts together a flat band of brightness. In a rental, plug-in sconces and rechargeable lamps can offer the effect without rewiring.
“Map three layers per room: ambient, task, and accent.”, Algedra
Forum users on the platform constantly identify lighting as the fastest improvement. Which means because it changes the room before new furniture arrives. That advice is sound. A costly sofa under one harsh overhead bulb still looks unfinished.
Step 6: Add Texture, Window Treatments, and Personality
Combine soft textiles with raw materials, then add one strong personal feature. You should end up with a room that has depth, comfort, and character rather than a crowded display of accessories.
Pair a smooth surface with a rough one: linen curtains beside wood, a wool rug under a stone table, or rattan near painted cabinetry. So curtains also soften echo, filter glare, and make windows feel finished, and choose washable fabrics in dusty or high-traffic rooms.
In most scenarios, select one lead pattern for upholstery or drapery, then let smaller patterns support it. A statement artwork, vintage object, or bold material can carry personality without forcing every surface to compete.
A plain room often calls for fewer objects, not more. Performance speaks.
Leave some shelf space empty, especially in compact apartments. Where accessories quickly become cleaning work. For a large blank wall, use this guide to plan wall decor around furniture width and viewing distance.
“Start with one lead pattern, often upholstery or drapery, and let everything else support it.”, House Beautiful
Step 7: Edit, Test, and Finish the Room
Live with the arrangement before final styling, then remove anything that blocks movement, repeats a color too often, or serves no useful purpose. You should end up with a room that works at breakfast, bedtime, and cleaning time.
Leave sample fabrics and movable items in place through different light conditions. Sit in each chair, open drawers, switch lamps on, and walk from the entrance to the window. These checks reveal problems that a photograph hides.
Edit in passes. First, remove unsafe or obstructive pieces.
Next, reduce repeated accessories. Finally, add one practical detail, like a tray, basket, curtain tie, or cable cover.
Add texture before adding another color. If the room feels flat.
The best version of how to interior design a room isn’t often the first arrangement. Good rooms improve through small corrections.
- Measure the room and mark doors, windows, outlets, and fixed fittings.
- Define the main activity before choosing furniture or decoration.
- Build a mood board with 2–3 neutrals, 1 accent, and physical samples.
- Layer the lighting with ambient, task, and accent sources.
- Edit the final setup after testing movement, comfort, and cleaning access.
Troubleshooting
Most room problems come from scale, glare, clutter, or weak zoning. Fix the cause instead of buying more decor, because extra objects rarely solve a layout failure.
Why does the room feel cramped?
Remove the smallest, least useful items right off the bat, then check whether furniture blocks the main path. Replace a lot of narrow pieces with one storage unit if the floor feels fragmented.
Why does the palette look mismatched?
For the average user, place all paint, fabric, wood, and metal samples together under daylight and lamp light. Reduce the mix to 2–3 neutral tones and 1 accent. If the room lacks visual control.
Why does the lighting feel harsh?
Turn off the overhead fixture and test lamps separately. Add a shaded source, a warmer bulb, or a dimmer, then keep the task light aimed at the work surface.
Why does styling look cluttered?
Remove duplicate objects and leave empty space on shelves. Keep one lead pattern or statement piece, then use texture to add interest without adding visual noise.
Why does the room feel unfinished?
What you’ll notice is that, in most scenarios, check curtains, rug size, cable control, and wall scale before buying ornaments. These practical layers regularly build a finished look faster than small decorative items bought.
People Also Ask
How much furniture should a room have?
A room should contain enough furniture for its activities. So while keeping clear movement and usable surfaces. Start with the largest functional piece, then add only items that support seating, storage, lighting, or comfort. Space helps furniture look intentional and makes cleaning easier.
Should walls and trim share one color?
In a small alcove or quiet bedroom, they can share one color. When you want a calm, tonal effect, especially, renters can put together a similar result with curtains, art, and accessories. Test samples first since natural and artificial light can change the shade.
What lighting is best for a living room?
A living room works best with ambient, task, and accent lighting used together. The ceiling fixture covers general visibility, a lamp supports reading, and accent light adds depth near art or shelving. Dimmers give you more control without adding another fixture.
How can renters redesign a room without painting?
Renters can change the room through movable furniture, rugs, curtains, plug-in lamps, removable hooks, and freestanding storage. These changes create zones and warmth without permanent work, and keep original fixtures safely stored if the tenancy agreement demands restoration.
FAQs
Is how to interior design a room difficult for beginners?
Setting that to the side, no, and beginners can create a strong result by measuring To start, defining the room’s job, and limiting early buys. A simple plan prevents expensive mistakes, and mood boards help test color and texture before commitment.
What should you buy first for a room?
Buy the largest functional piece first, like a sofa, bed, table, or desk; its scale controls later decisions. As it turns out, lighting should follow soon. After because it changes how every finish appears.
What to Do Next
Choose one room, measure it today, and photograph its fixed features before shopping. Then create a small mood board and test the largest furniture footprint with tape.
Under normal conditions, use this process to design a room’s interior, but keep the plan personal. If the space is a bedroom, compare these calmer bedroom ideas. If it’s a kitchen, review practical kitchen planning before selecting cabinets.
The strongest result won’t come from copying a showroom. On average, it’ll come from a room that supports your real routines, handles local light and heat, and still feels comfortable. After the camera is put away.